The Tapni admin dashboard (Bulk managing) is designed to help organizations manage large teams efficiently without editing each profile individually. Instead of updating users one by one, administrators can apply changes across multiple profiles at once - including teams, templates, branding, QR codes, company links, etc...
This centralized approach is especially useful for onboarding new employees, preparing teams for events, maintaining brand consistency, and ensuring company information stays accurate across all profiles.
By managing profiles in bulk, companies reduce manual work, avoid human error, and keep every employee aligned with the latest company standards.
Faster onboarding - set up entire teams in minutes
Consistent branding - every employee uses the same layout, links, and design
Easy updates - change information once and apply it everywhere
Event readiness - quickly prepare QR codes and profiles for conferences or trade shows
Centralized control - manage company-wide information without editing individual user
Follow the steps below to learn how to manage users in bulk from the admin dashboard.🚀
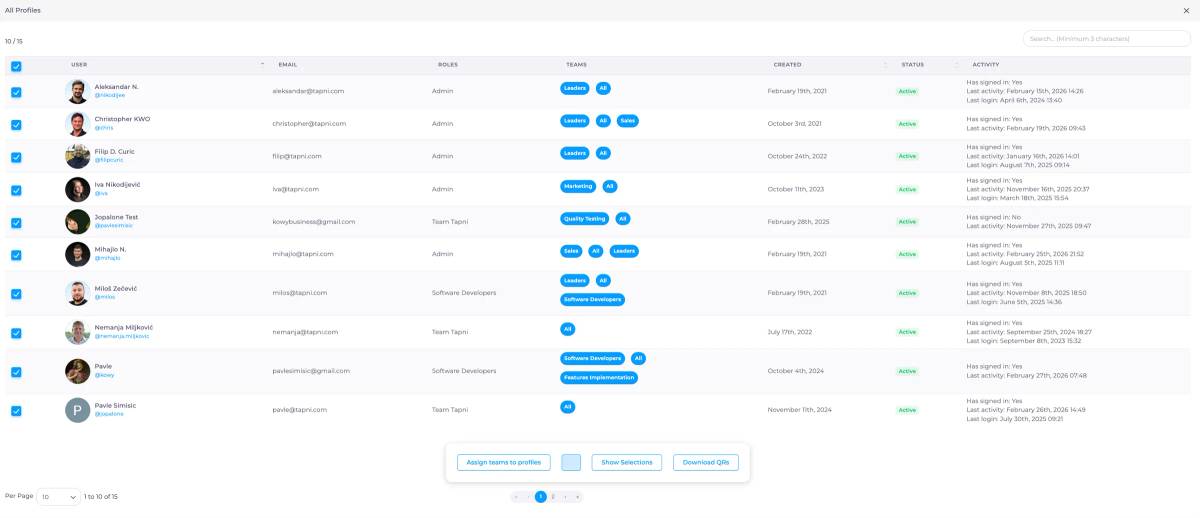
PART 1 : Selecting Multiple Users / Disconnect profiles / Delete Profiles / Show Selections / Download QRs / Export Profiles to xlsx
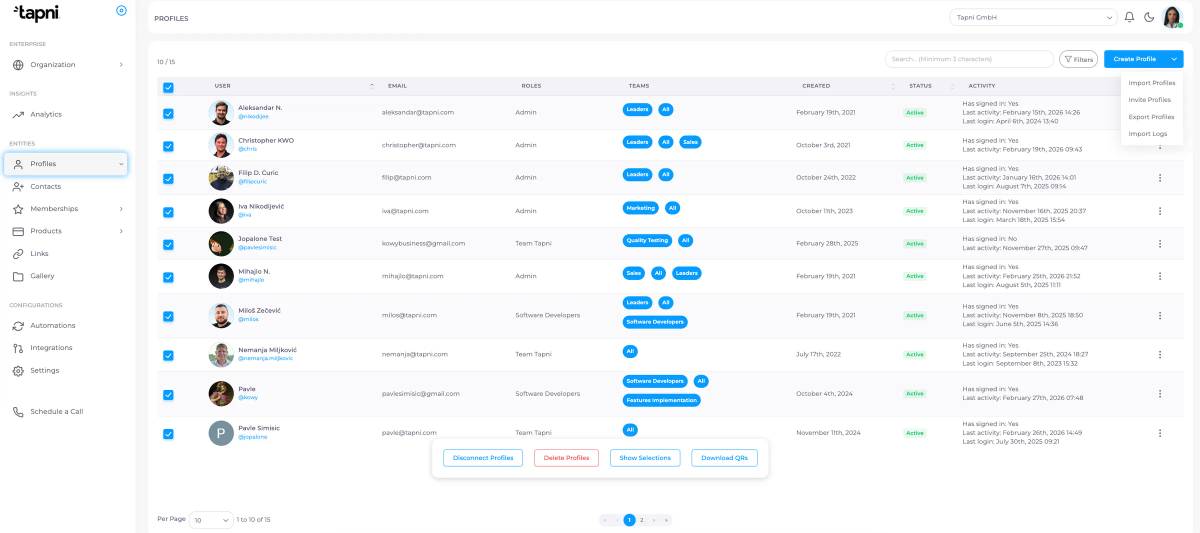
Admins can manage multiple profiles at the same time directly from the team list. By selecting several/all users, you can quickly perform actions such as disconnecting profiles, deleting them, viewing selections, or downloading their QR codes - all in just a few clicks.
Disconnect Profiles - removes the profiles from Business Dashboard
Delete Profiles - permanently removes selected profiles
Show Selections - review selected users
Download QRs - download QR codes for all selected profiles
PART 2 : Managing Contacts in Bulk (Contacts Section)
The Contacts section allows admins and users to manage all collected leads in one place. Instead of editing each contact individually, you can organize, export, categorize, or remove multiple contacts at once.
This is especially useful after events, conferences, or large networking activities where many connections are collected in a short period of time.
Bulk contact management helps you quickly prepare leads for CRM sync, categorize contacts by event, and keep your database clean and structured.
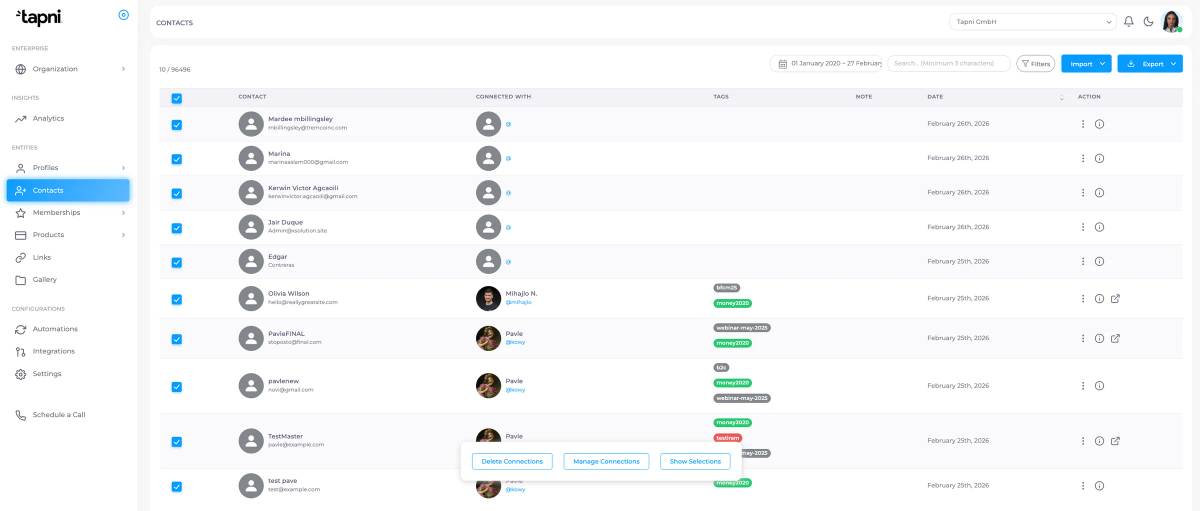
After selecting few of them / all a bulk action menu will appear.
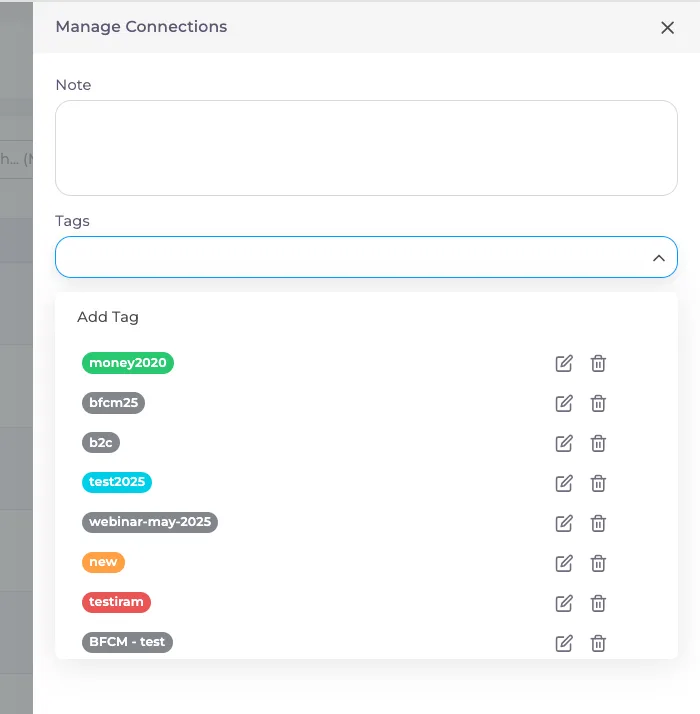
Filtering Contacts
You can filter contacts before performing bulk actions.
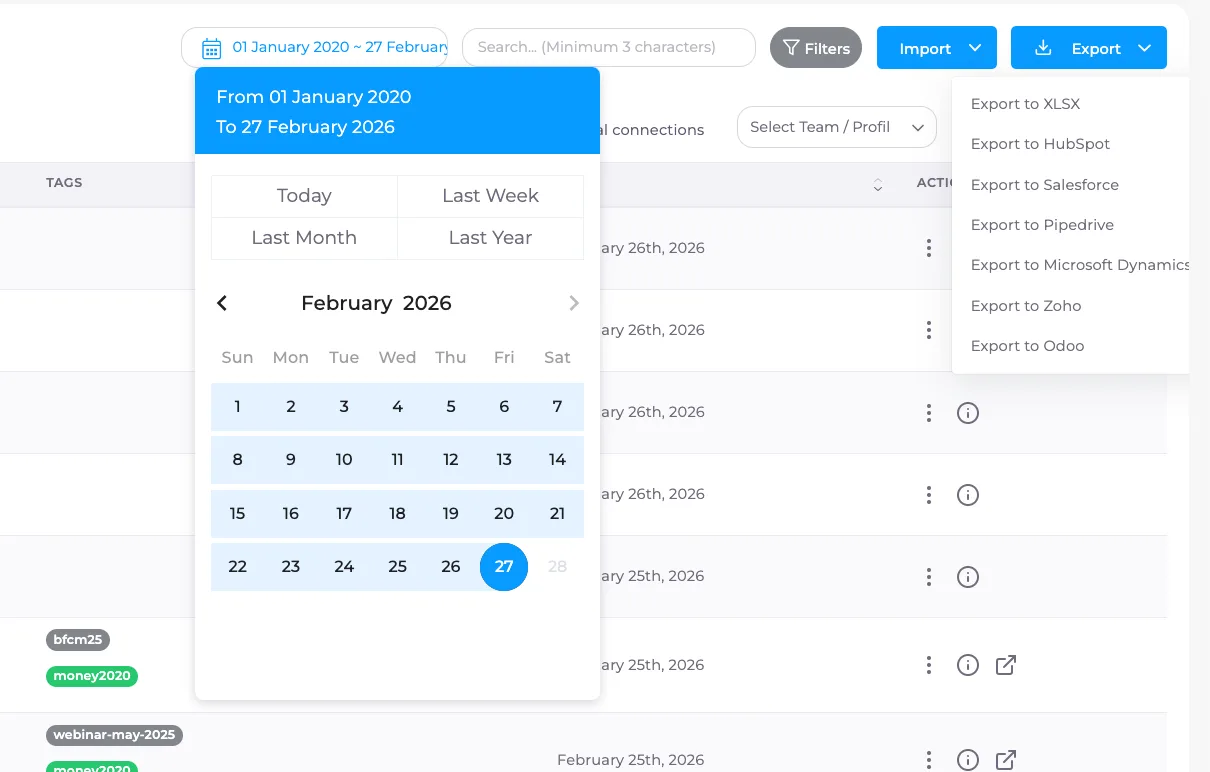
Use Filters to:
show contacts from a specific event
filter by tag/category/date
narrow database before export to CRM
prepare segmented follow-ups
PART 3 : Deviding users in bulk by team/department (Teams section)
The Teams section allows organizations to structure users into departments such as Sales, Marketing, HR, Leadership, or Event Groups.
Instead of managing every employee individually, admins can organize users into teams and apply shared settings across entire groups.
Teams are especially useful for maintaining consistent branding, tracking performance, and preparing different departments for events or campaigns.
Why Teams Matter
Using teams allows you to:
apply different profile templates per department
assign specific company links to a group
track analytics separately by team
organize users by role or location
prepare event-specific groups
manage large organizations more easily
The All team is the default team - every user automatically belongs to it.
Creating a New Team: Go to Teams section inside Business Dashboard, click on 'Add new Team', enter the Team name, and Save.
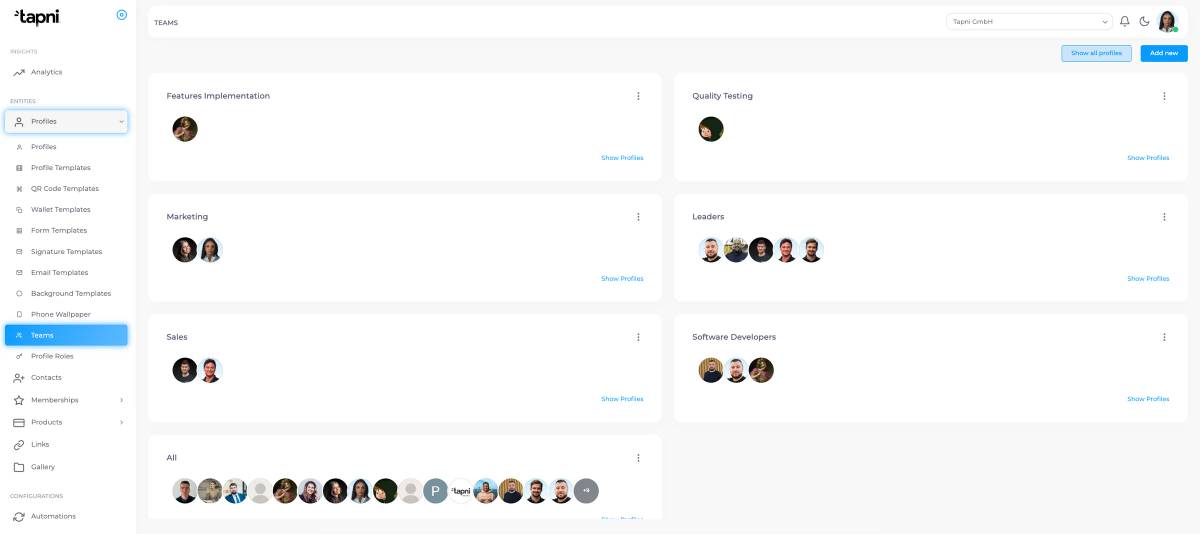
Viewing All Profiles (Bulk Editing) :
Inside the Teams section click Show All Profiles (top right). This opens the bulk management view where you can organize users across teams.
Assigning Users to a Team :
Result:
All selected users are added to the selected team.
Removing Users From a Team :
If users were assigned incorrectly select profiles, and eassign them to another team or remove from the current one.
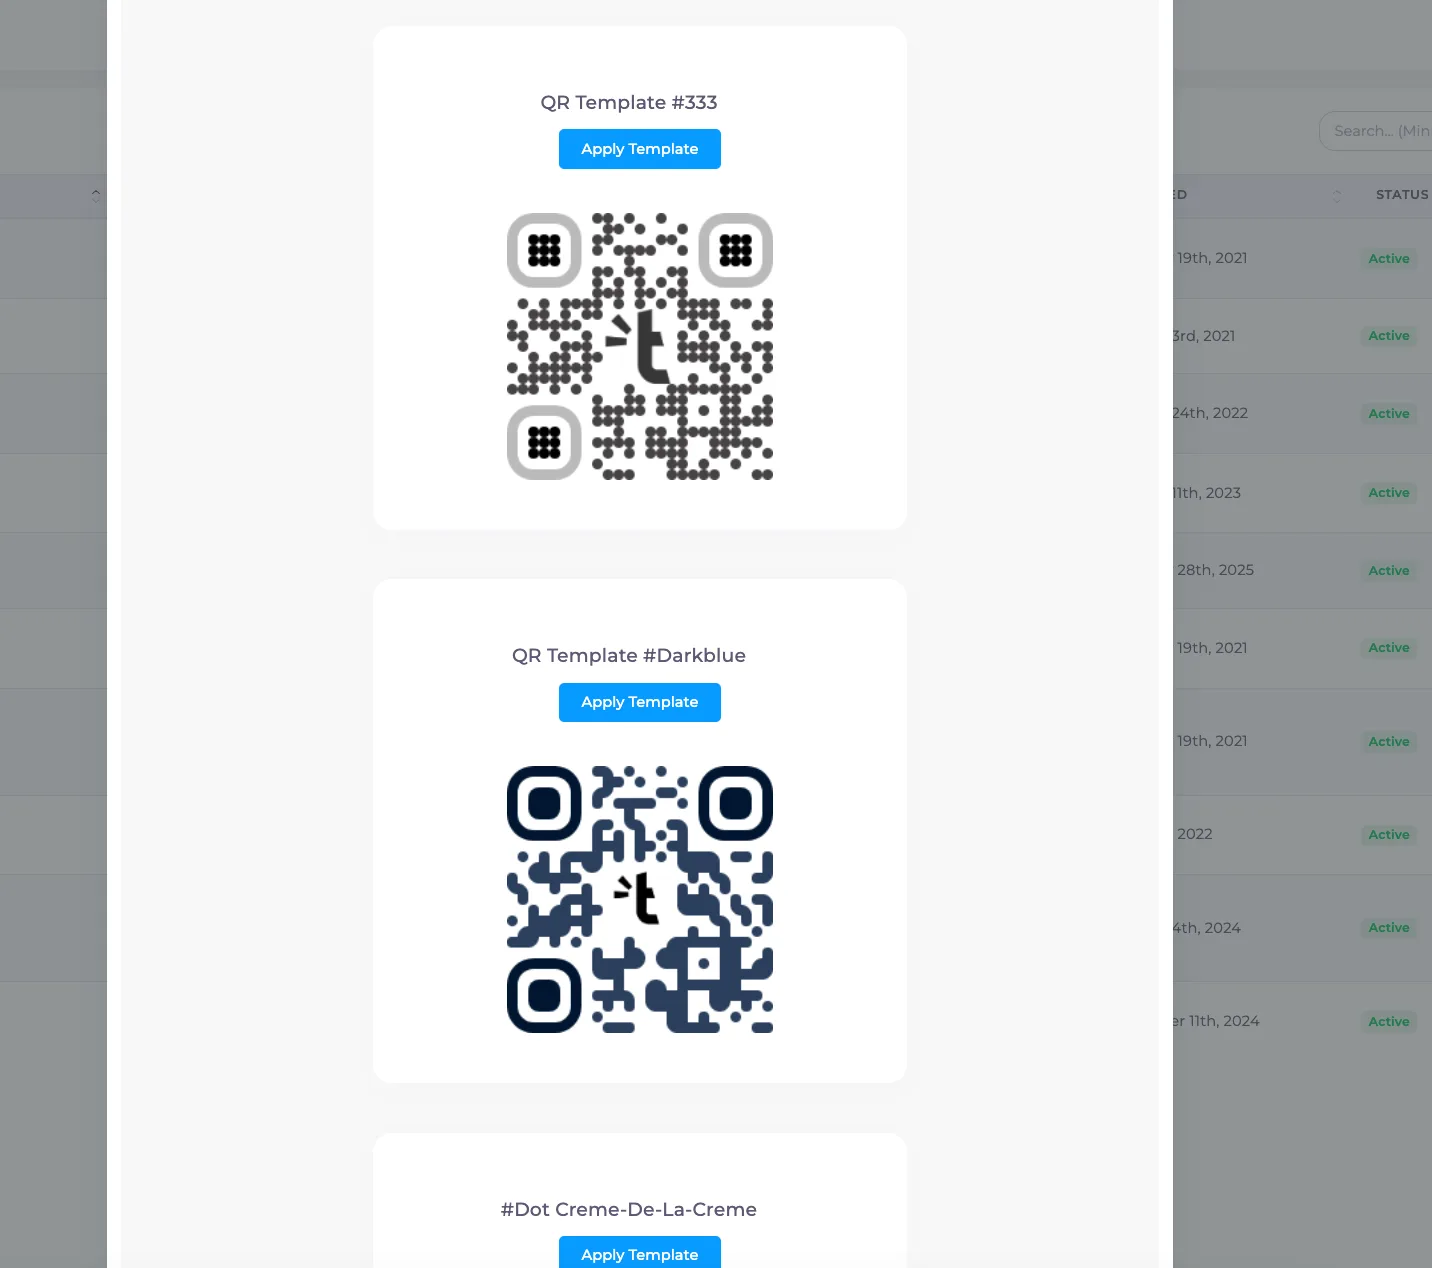
Team QR Codes:
Teams can have different QR templates and branding.
From bulk actions you can:
download QR codes for a team
prepare event badges
ensure departments use correct branding
Team Templates & Analytics :
Each team can have:
unique profile templates
different company links
separate analytics tracking
This allows companies to measure performance by department - for example comparing Sales vs Marketing engagement.
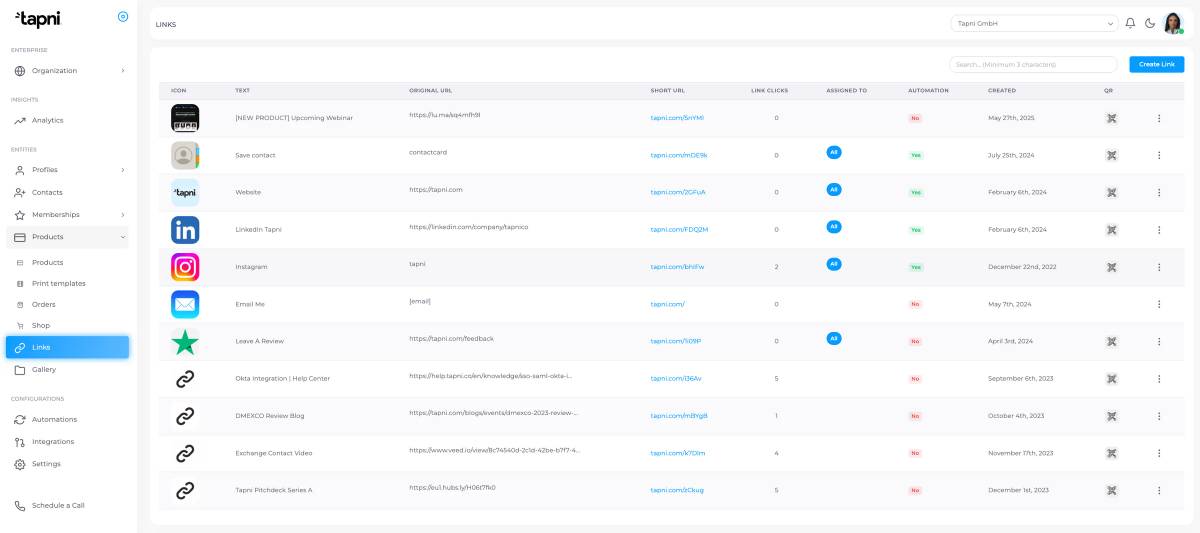
PART 4 : Managing Company Links
The Links section allows administrators to create company-wide links that automatically appear on employee digital profiles among their personal links inside the Tapni app.
These are not personal links - they are company links controlled by the organization.
This ensures every employee shares up-to-date company resources without manually adding them.
What Company Links Are Used For :
company website
booking calendar
product catalog
brochures
pricing pages
social media pages
support or help center
campaign or event landing pages
Assigning Links to Teams :
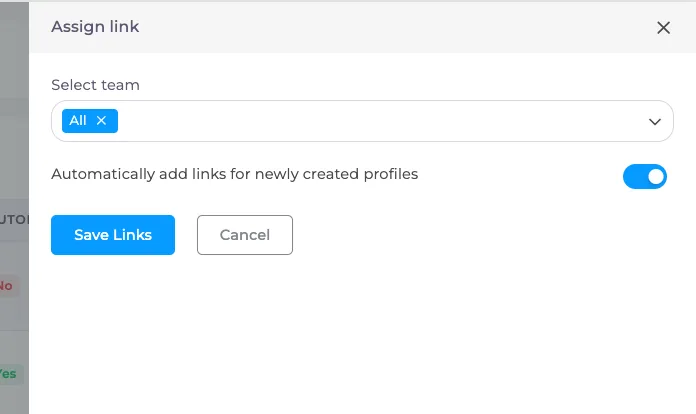
Every company link must be assigned to a team to become active.
How it works :
Assign to All → visible to every user in the organization
Assign to Sales → only Sales team sees it
Assign to Marketing → only Marketing team sees it
Example
If your company website should be shared by everyone → assign to All
If a pricing brochure is only for sales → assign to Sales team
Automatic Distribution to Users :
When a link is assigned to a team:
all current users in that team receive it instantly
new users added to that team receive it automatically
no manual editing per profile is required
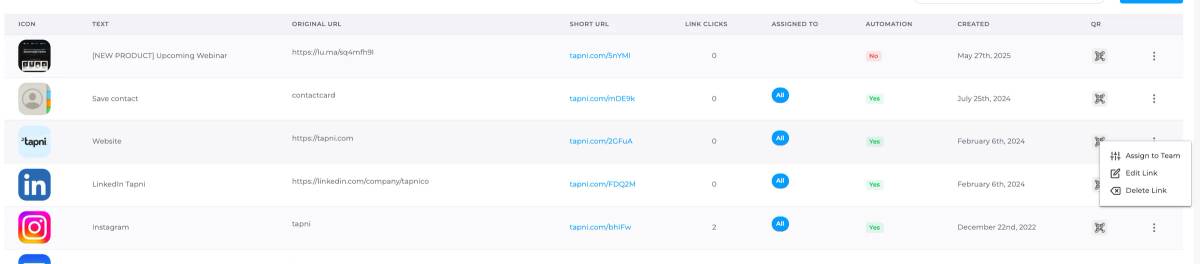
Editing, Activating, or Deactivating Company Links :
Admins can control links at any time.
From the link menu you can:
edit link details
change assigned team
enable or disable the link
delete the link
This allows temporary campaigns or seasonal links to be turned on/off with one click.
By using Company Links, your organization keeps every profile consistent and always up to date.
Instead of relying on employees to manually manage resources, admins can control what is shared across the entire company or specific departments in just a few clicks.
This ensures the right information reaches the right audience - every time someone taps a Tapni card.
Stay consistent, stay accurate, and share with confidence. 🚀
Browse our comprehensive product guides and documentation



Stella-Klein-Löw-Weg 8, 1020 Vienna, Austria